Installing Full Length Denali/Escalade Console
In your 95-99 GM Full Size Truck/SUV WITH the floor 4X4 shifter.
I decided that I really wanted the full length console from a 99-00 GMC Denali or Cadillac Escalade, I have had several different consoles in the tahoe, but really never cared for any of them, I decided to experiment. I have heard it several times that it won't work, but I wanted to try it. It does work...
This is how to install this nice feature into your OBS that didn't have this option...
Bear in mind when looking for the console, the GMC's were mostly grey, and the Cadillacs were mostly in tan.
As most everyone knows, the most sought after center console for a OBS Chevy or GMC has to be the console from the above SUV's. They are getting to be very short in supply, and not to mention very expensive. As luck would have it, I found a Caddy console in the local pic-a-part, and it cost me a whopping $20!
In this write up, I will show you...
1- Prepping the console, if needed. DONE
2- Repositioning the 4X4 floor shifter. DONE
3- Hooking up the BOSE sub to your aftermarket radio. DONE
4- Hooking up a 4wd indicator light. DONE
and
5- Making your cupholders glow. DONE
Let's get started!
I have had my console sitting gathering dust on my kitchen floor, when I decided to finally do something with it. the first hurdle to overcome was the simple fact that it was the wrong color. Here's how I took care of issue 1.
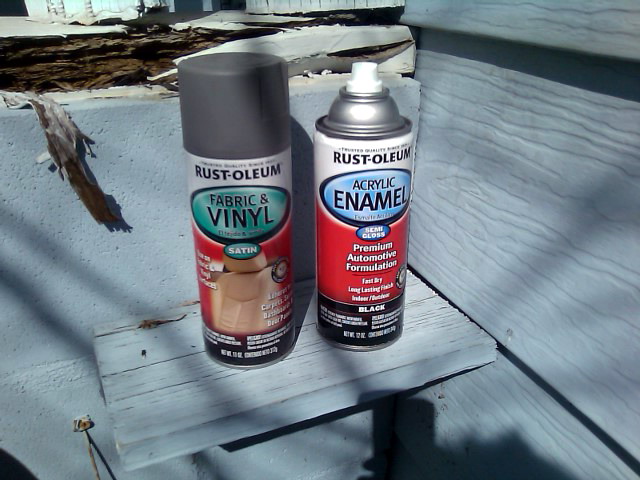
These paints can be found at your local auto parts store. Notice the grey is satin, but for some reason, I can't seem to locate it in PA anywhere. I did however find it on Amazon.com The part number is 248920.
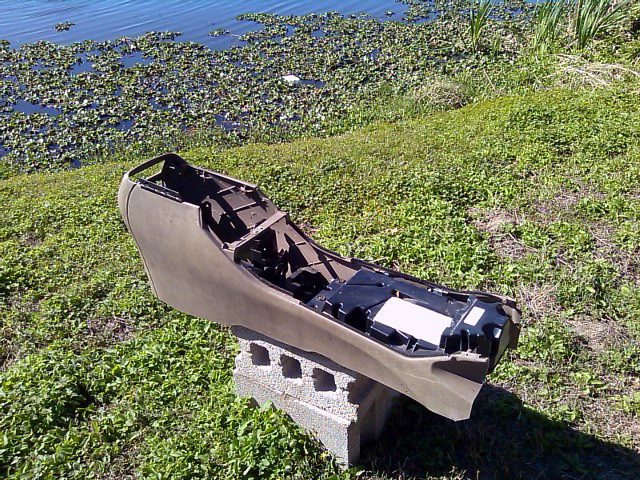
The tan Escalade console.
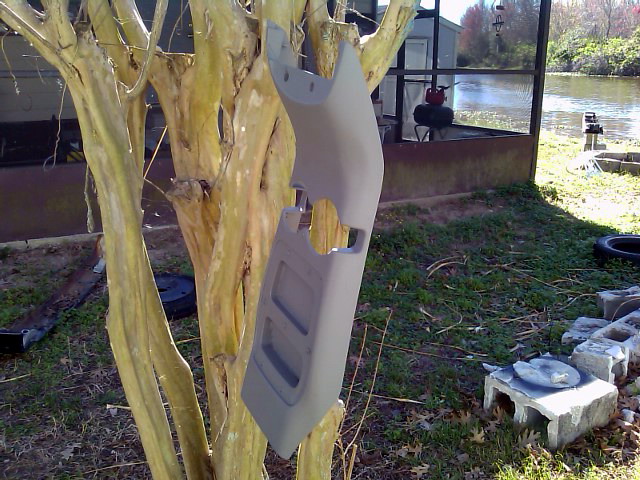
The center piece all primed and painted.
This is the woodgrain center trim piece that goes onto the part hanging from the tree above. I chose black for my highlight color, but you can choose a matching color for your truck.
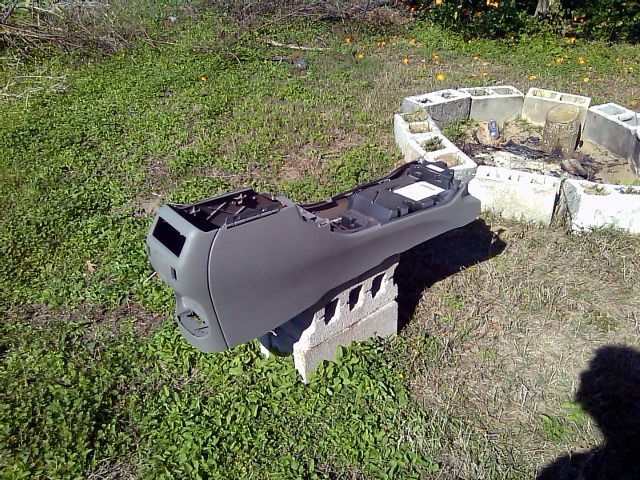
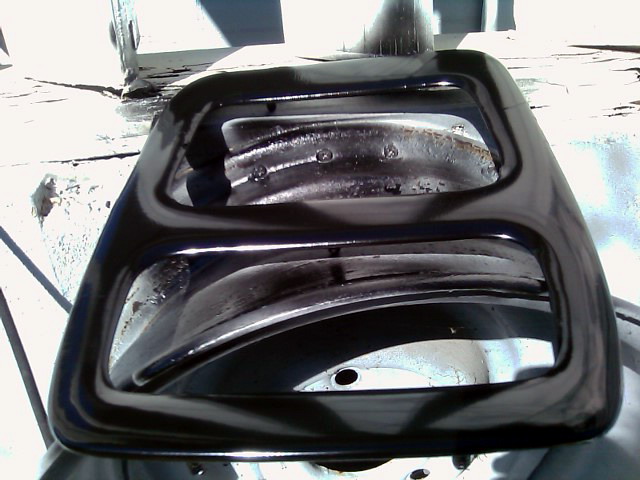
The tan is now grey, and will now match my interior...
Now, Phase 2...
Now we need to begin to figure out what to do with that big old shifter. I was in the favorite pic-a-part and there was a OBS truck, and a NBS truck side by side. The NBS truck had 4wd, as did the OBS. I decided for fun, I was going to pull the bezel off the newer truck and see what it looked like. To my surprise, the piece that the physical shifter bolts to, was the same on BOTH trucks... Needless to say, I grabbed the trim piece, the shift lever, and the knob. I think I figured it out.
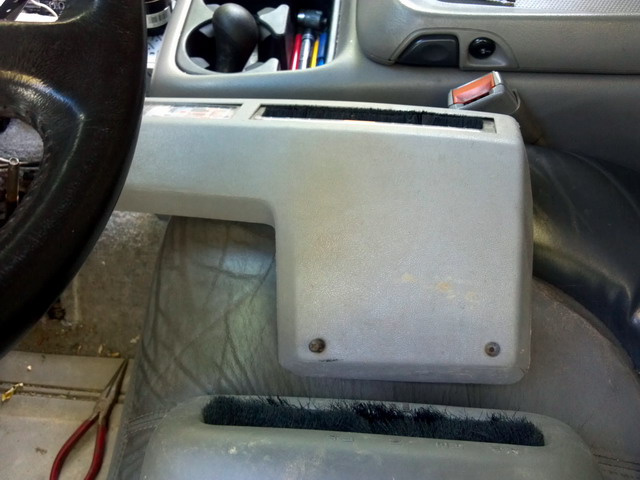
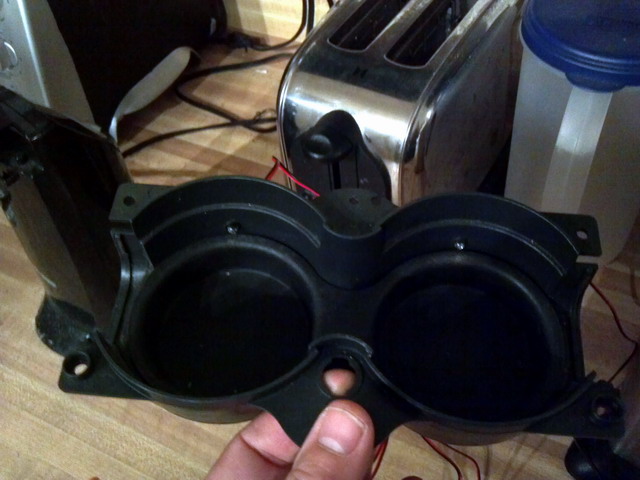
Here is the issue. GM (Or as my friend Shawn calls them, Generous Motors) made this highly decorative piece with a really neat picture of a truck on it, but...It's way too big to accomodate the full console. Lets change that now.
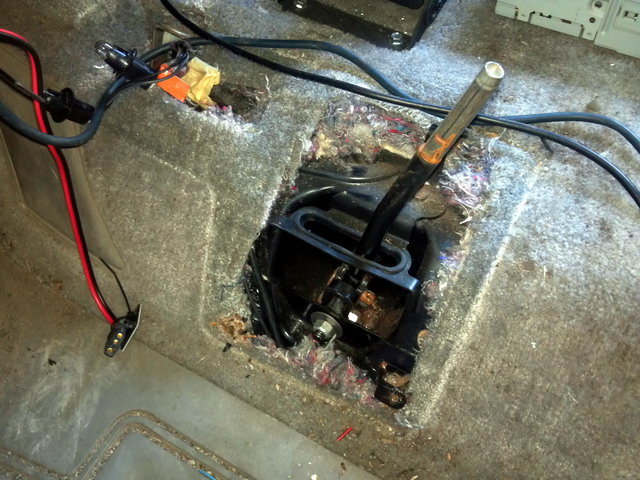
After Pulling the shift knob stright off (press fit), and removing the 4 screws that hold the cover on, and removing two light sockets from the spot, this is what we have. Notice the shifter comes up, bends to the right, then goes up. The shifter is simply held in there with a pin and a cotter pin. Very simple to take off. It is very easy to remove in the neutral position.
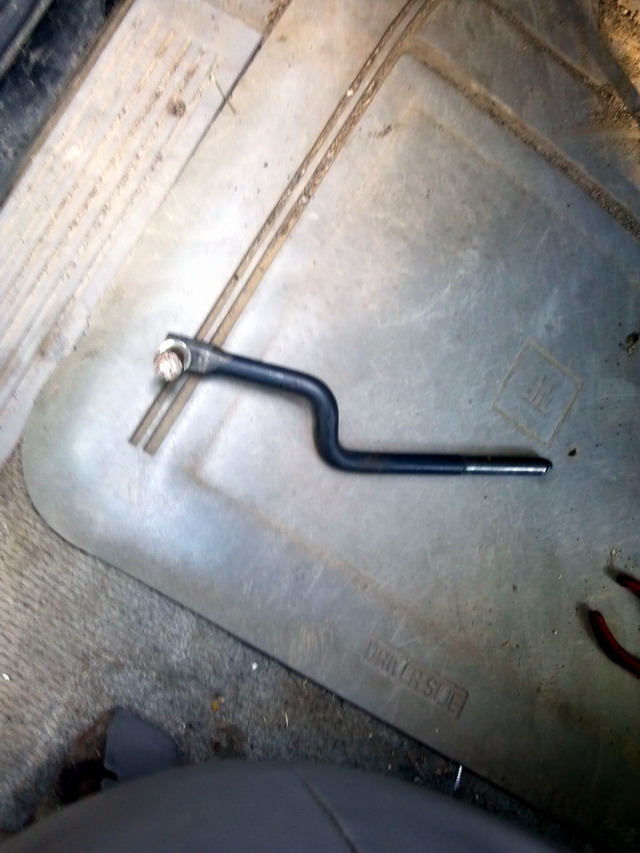
Here it is all removed...
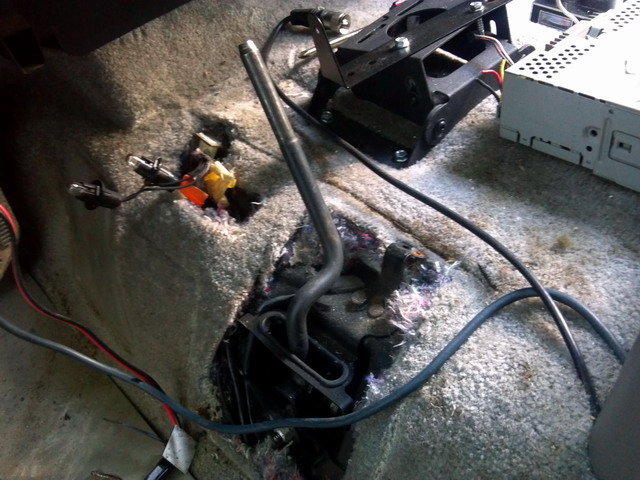
Here is the new NBS shifter installed in the same hole. See how the new shifter rod is straight as opposed to the old one. Very simple so far.
You can see here the height of the screw holes on the bottom of the old shifter cover. We need to duplicate this on the new cover, which, by the way, is a whole lot smaller.

I simply used my cut off wheel and cut along the red line...Made it fit right, and oh, by the way, the screw holes line up perfectly. The bottom 2 are the only ones that will be used.
Cover installed.
 .
.
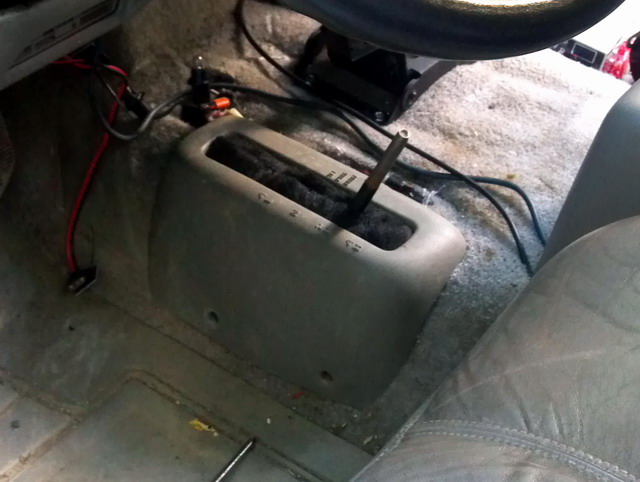
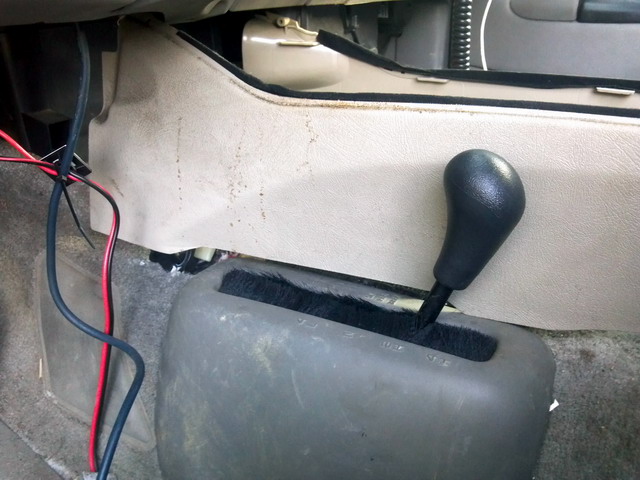
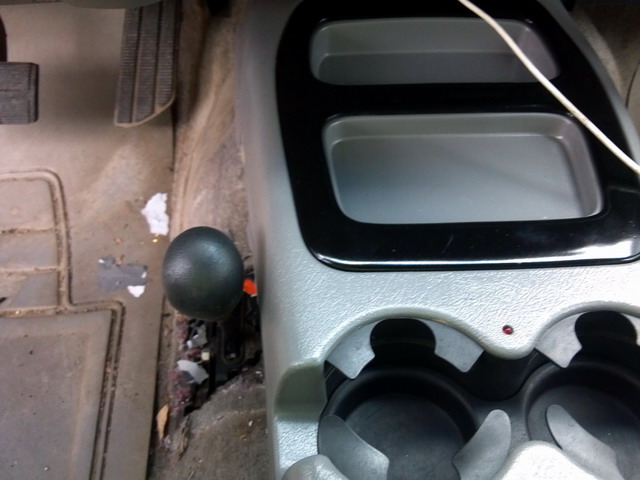
You can see here how much less room it takes here than the old one, and it is moved over enough now to accomodate the full lenght console., although there may have to be a SLIGHT bit of trimming on the console bottom, but I am not sure yet.
Another view, with the knob pressed back on. I did look at the new console, and it seems to curve slightly inward in this area anyhow. This is starting to look better and better. Don't worry about the carpet cuts from the old shifter, and the lights. The console will cover the carpet, and the lights will be put to use.
Time for Phase 3...(yeah, lots of phases...)
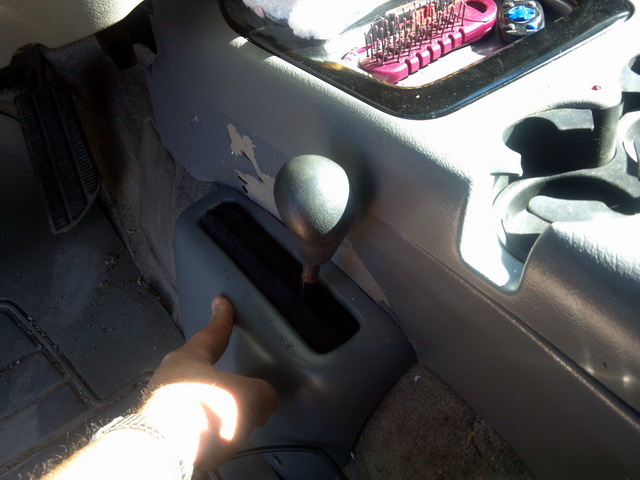
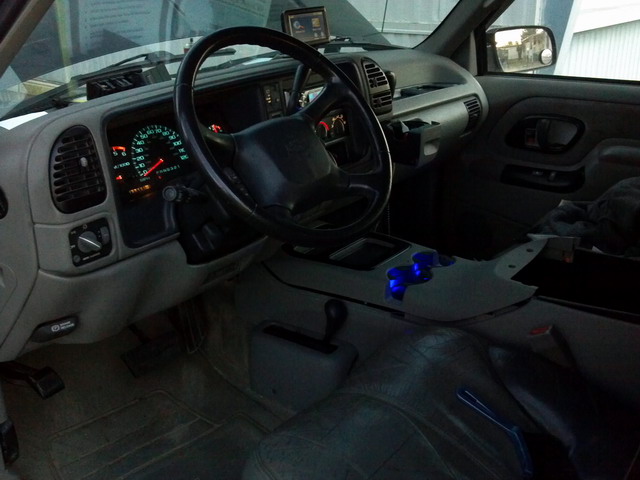
I decided to test fit the console, and see how it would look. It sits a wee bit high, because it needs trimmed a bit on the left side...
You can easily see where the trimming needs done at. I can go about this one of two ways...Trim the console, or simply trim the shifter cover. I will probably do the cover, as if I were to accidentally mess it up, it's not too hard to locate one.
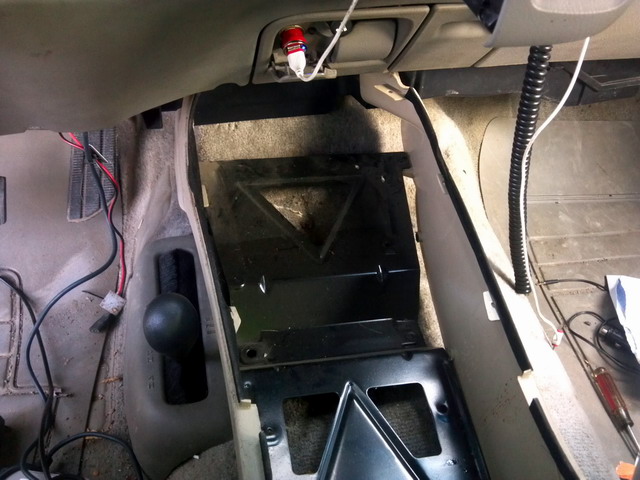
The carpet needs to be trimmed and it should drop right into position. I will post a picture of the carpet cut as well.
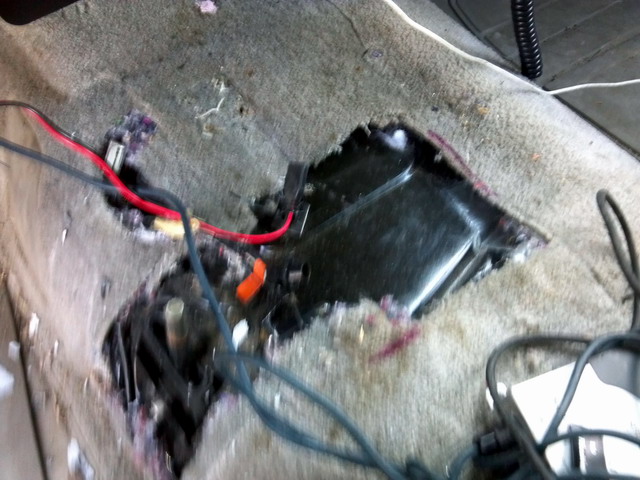
Here is that aformentioned cut...I made it a bit bigger than I really needed, but if you look, it need not be any wider than the cut that is there for the factory shifter. I have a thought so I made it a little bigger.
Here is the console, in place and bolted down. At least temporary. It is going to come back out for a little more work. That little red LED between the cupholder will be spliced into the 4wd indicator light, letting me know when I am in 4wd, in addition to the raised letters on the cover itself.
I cut the cover down to meet up with the console. When it is screwed into position, it will press up like this I may look and find some interior welting, and put some in there just to improve the look. Unfortunately, The peeled paint is what happens if you don't prep and clean the console before you paint it. This will be dealt with quickly.
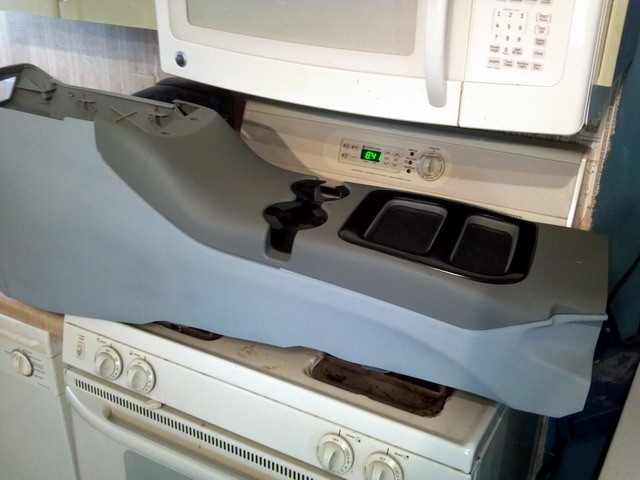
I did say quick, didn't I? Here it sits on my stove, all primed and done. I did shoot the upper piece in the Rustoleum 248920 already, and you can clearly see the color difference between that and the primer/sealer.
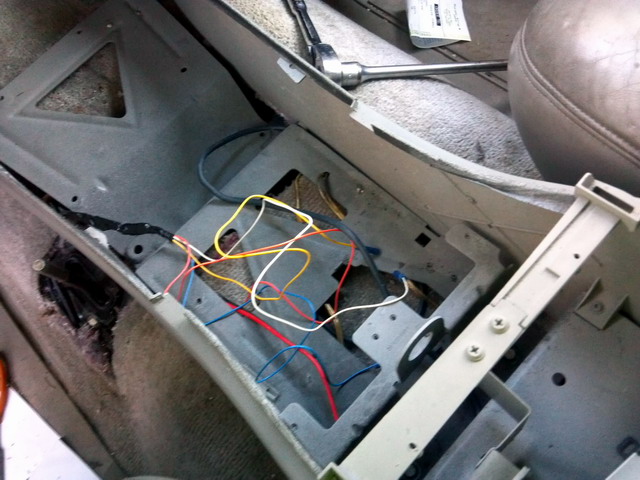
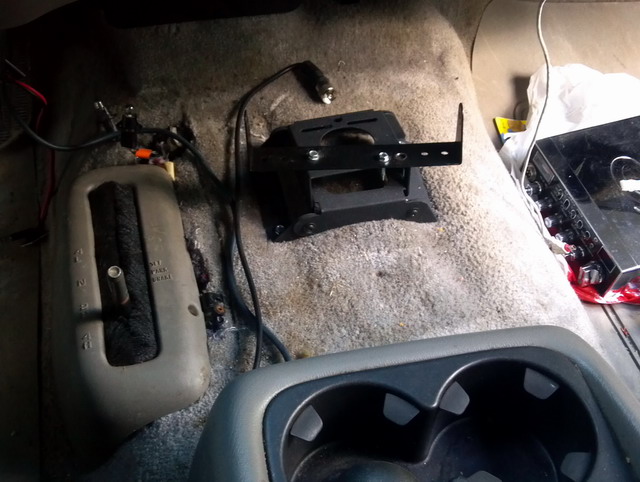
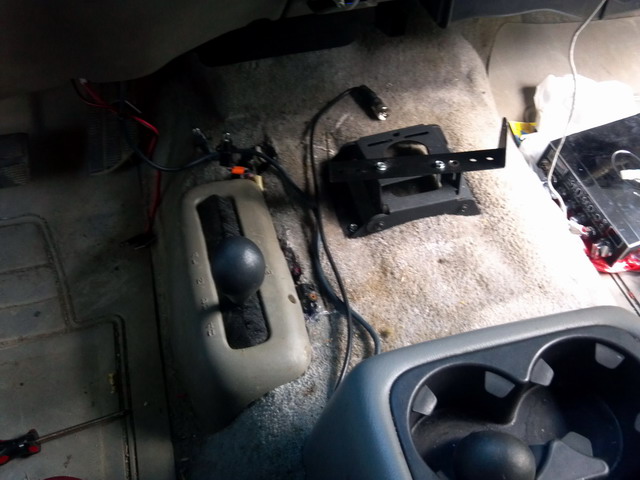
After sitting the console in place, I moved all the wires where I needed them to go so they are out of the way. I used the same bolts the original console had. They will hold it in there just fine.
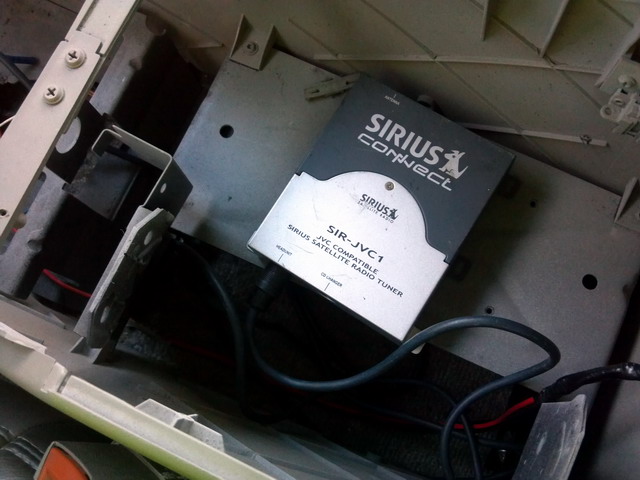
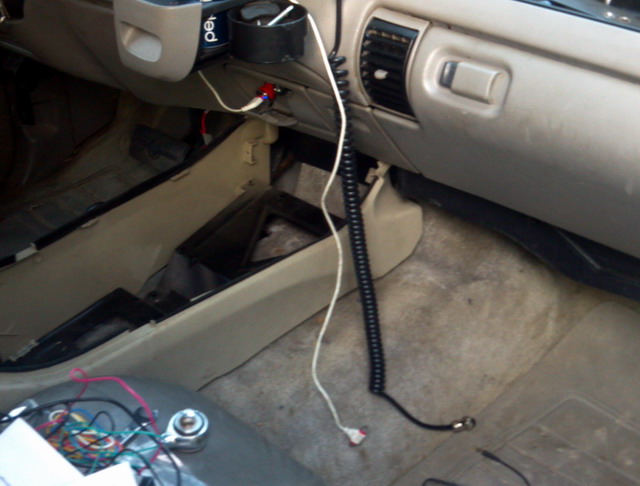
Hooked up the JVC Sirius controller and the Ipod controller. They will be buried under that metal frame that are sitting on at the moment. My cobra CB is going to find a home in the spot where the cd hanger used to be. The wire is already run for it.
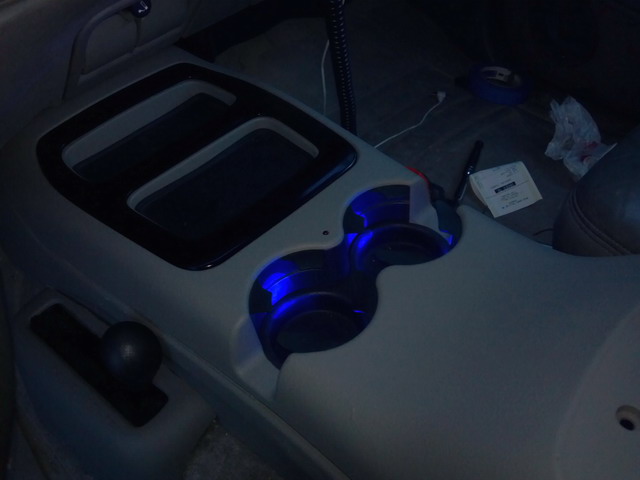
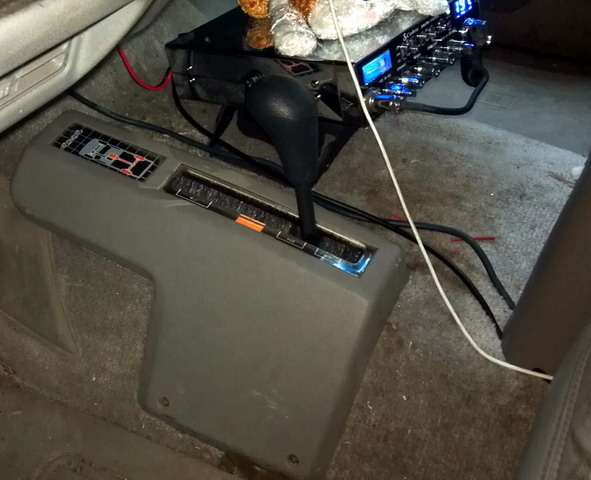
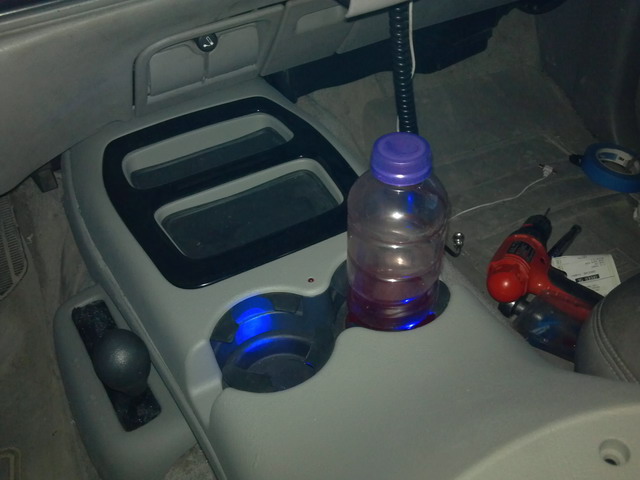
All set and in...And the cupholders are now lit!
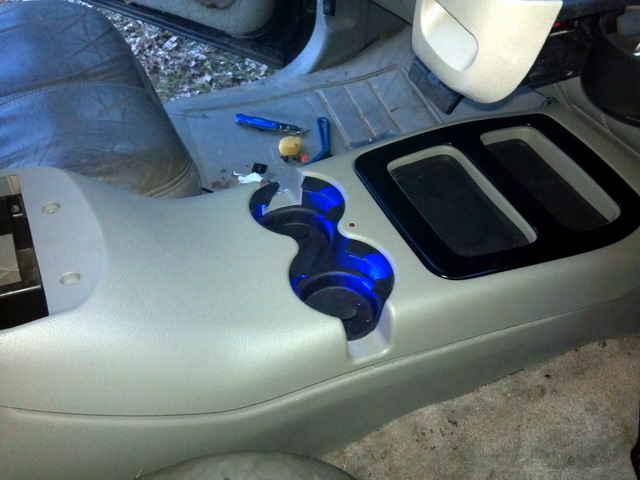
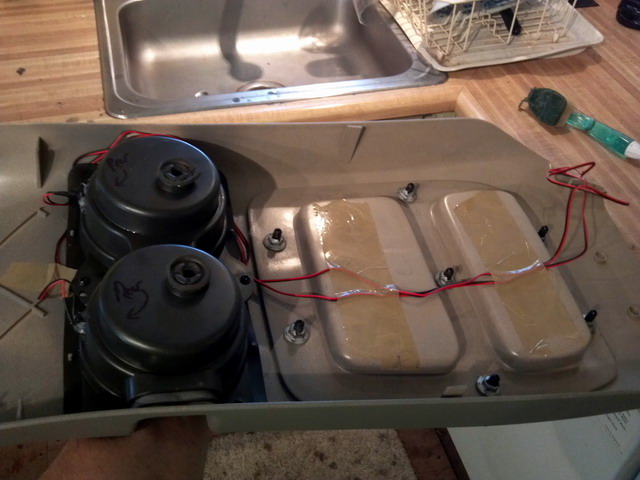
I am happy with the results. Except that I accidentally mounted the subwoofer incorrectly, but thats a easy fix. Its supposed to go below the mounts, not on top.
Like I said, I have the subwoofer in wrong, that's why the front piece is up a little bit. Hopefully, I can fix that tomorrow.
Tomorrow, if it isn't freezing out, I will finish it all off. The knob is just right, and out of the way. I want to get the armrest and the rest of the little things on. At least you can see here that it most certainly can be done.
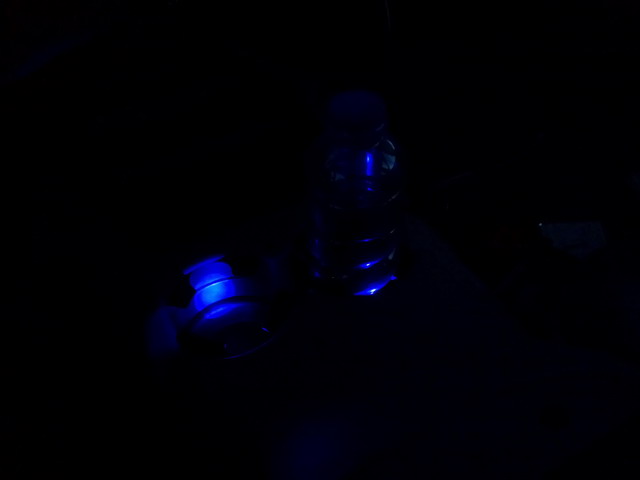
I know it's a little dark, but it makes the bottle glow a bit...Just enough but not super bright.
In the meantime, let's go to phase 4... I know this is a little out of order, but...
I wanted to make finding the cupholders a little easier at night so I was trying to figure out how. I knew I wanted to make the truck look a little more modern as well, so I decided to go with some small blue LED lights I found at Pep Boys. The were $6.99 which isn't too bad.
All you have to do is drill a 7/32 hole and install the LED's with the supplied directions. I chose to use a little clear silicone on the back to make sure they don't fall out.I also drilled them into the rear of the cupholders, in order to cut any glare facing me, so now they are glowing from the rear forward.
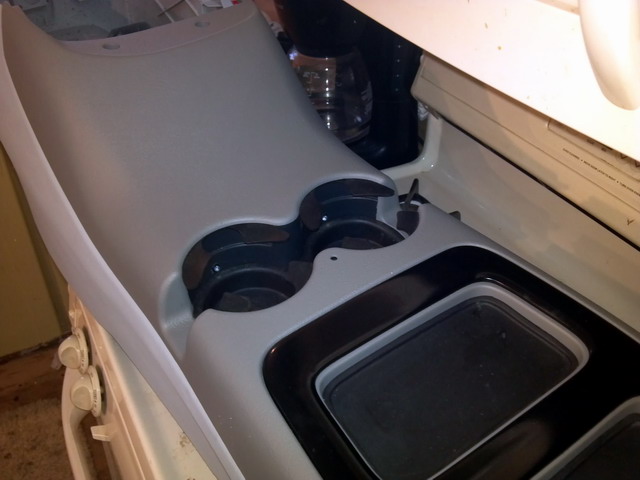
My thumb is on the hole for the new 4wd LED hole, and you can see how the 2 LED's are sticking slightly through the cupholders. Again, these are blue, and I think they should light it up perfectly. These will simply be wired into the wiring for the old 4wd shifter light, so that they come on with the parking lights.
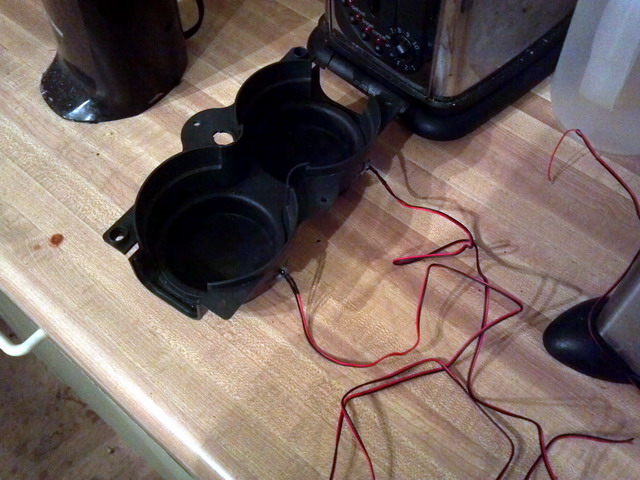
I neatly taped up the wiring using a industrial packing tape for longer hold. The wires will easily drop to the front of the console, where I can easily hook them up before installing the sub.
Here you can see the 2 LED's in the rear of the cupholder. I am hoping it puts a nice blue glow on the clear bottles...That will be different for sure!
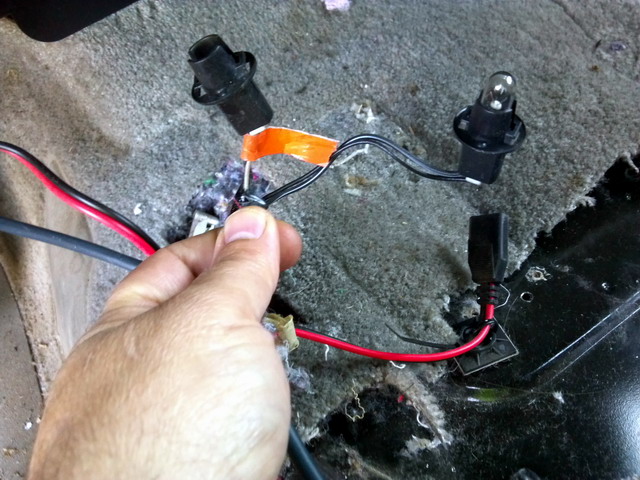
By the way, these are the two sockets that came out of the existing 4X4 shifter assembly. It is real nice to have these wires already run under the rug where they need to be. The one with the orange tape is for the dash lighting for the former little truck and range indicator (now to be used for the blue cup LED's) and the other will light up the red LED for the 4X4 when it is engaged.
Lets move on to phase 5...
The Subwoofer...
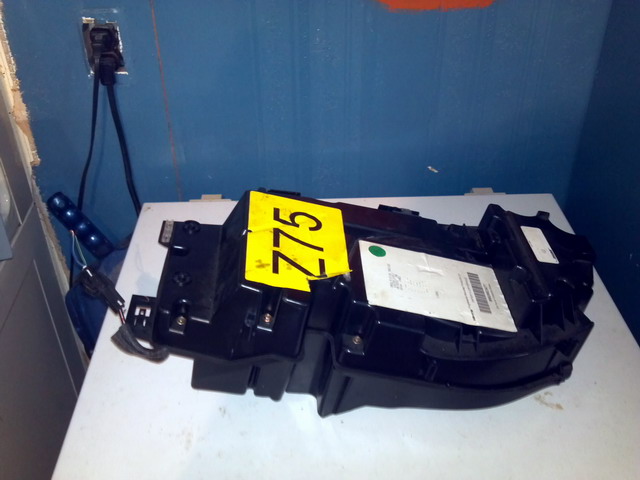
Here it is...The dreaded BOSE subwooofer. I decided to use this because it fits so nice in the console, and besides, I actually have 4 of these crazy things here. I did research and came to find out that the red wire is the negative, and the blue is positive. Go figure... I did tear one of these units apart to check the speaker and it is in fact a nice size with a good size magnet too. I also tested my theory about it working at all by using the aftermarket amp in my sons 02 Sierra to power this one, and it worked, and I might add, sounded great. Can't wait to get it in here!
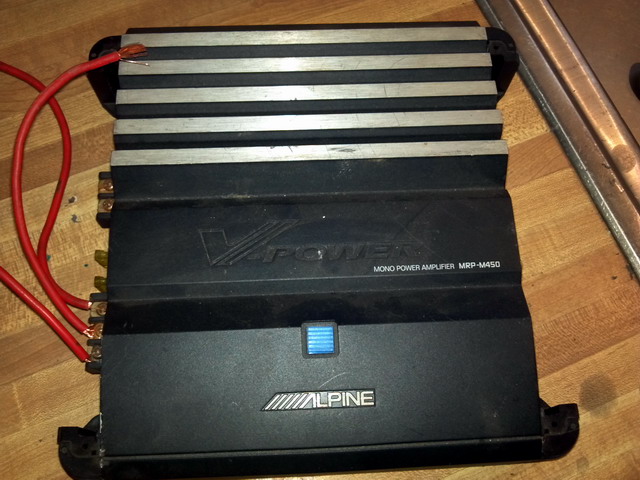
Found this Alpine single channel (mono) amp on craigslist for $30 bucks I will simply install this to power the sub. It should be fine. This part of the console install will be the toughest, because I have to have my buddy come up and wire this in for me. It's a nice little amp, and puts out about 220 watts. More than enough for the sub. I was going to stick this under the rear of the console, but a few people told me not to do it cause it could get hot in there because of no airflow.
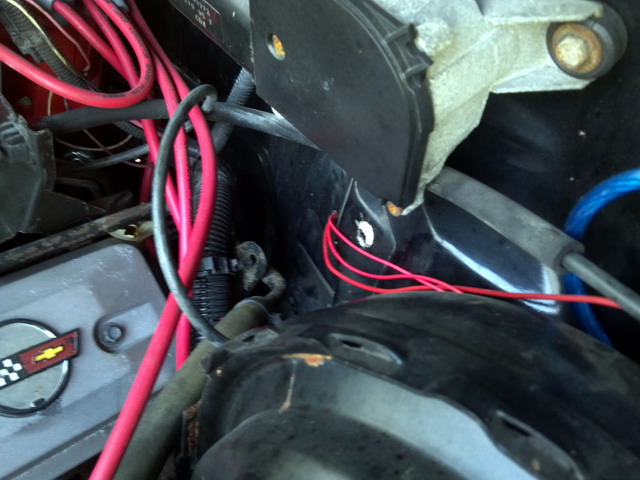
I think the hardest part of any amp install is where to come in at. I chose this area right here because it is easy to access under the dash. just above the accelerator.
Make sure you install a grommet on that hole...May save you a fire down the road!
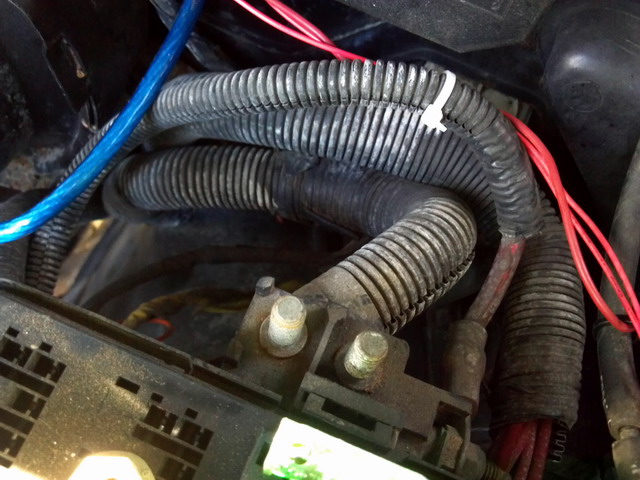
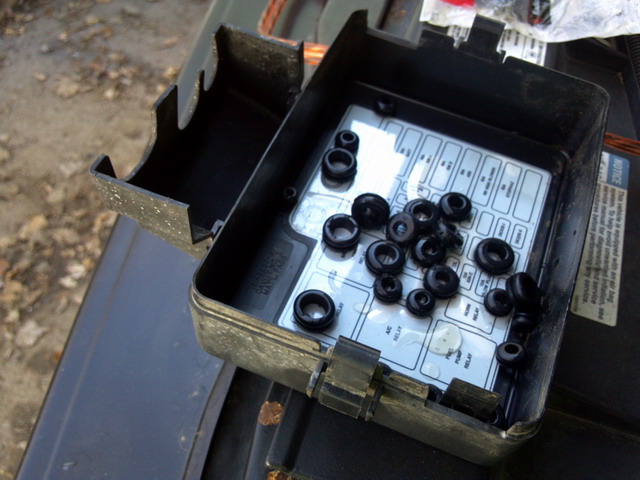
I decided after thinking for a bit, to simply tap into the power block. This gets power direct from the battery, and the amp I am using is not that power hungry.
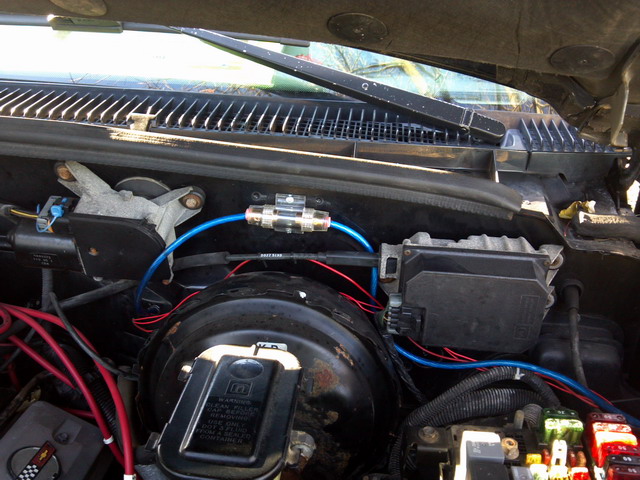
When it's all done, it should look a little like this... I mounted the fuse where it was very easy to get at.
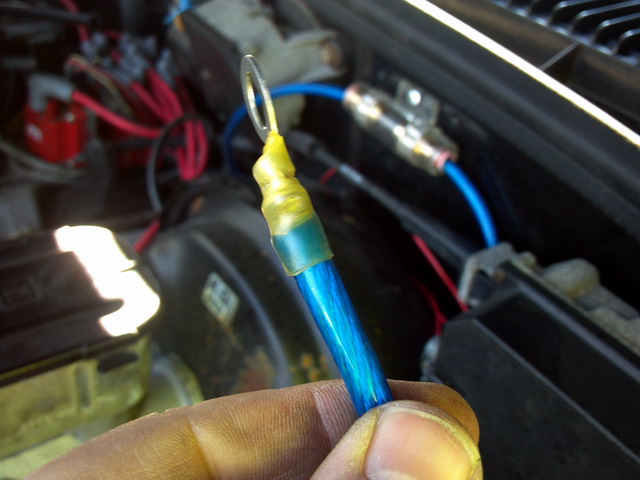
I used this heat shrink weatherproof connector for the power hookup. I don't want to leave anything to chance.
More to come!

.png)
.png)