Installing Trailblazer Steering Wheel on OBS Tahoe
In this writeup I am going to show you how to adapt the newer style steering wheel out of a Trailblazer, into a OBS Chevy or GMC. While I am showing you what I did, I assume no liability in any way should you try it and it not work. Mine is working just fine, and I think it looks really good in there.
You will need the following tools:
Small tipped snap ring pliers for external lock ring.
Small screwdriver, and or hook tool.
13/16 or equivalent socket, short extension and ratchet.
Steering wheel puller.
Obviously, the first thing you must do is remove the old steering wheel...and in order to do this, you must remove the airbag.
The vehicle must be off. Set the emergency brake and observe all precautions for working on the vehicles electrical system. Remove the SIR fuse from each vehicle you are working on, unless its in a junkyard and use precautions for working with the vehicles air bag (SIR). I shall not be responsible if you goof and the air bag removes a body part. Play it safe and pull the fuse, or even disconnect the battery. On the Full size , at least in the Tahoe it was fuse 10. Wait at least 30 minutes for any stored energy to dissipate from the system.
Start by removing the air bag module. On the back side of the steering wheel there are two slots to access the spring that retains the two module retention pins. These spring clips need to be pushed to the center to disengage from the notch. Easier said than done. Older large bag wheels have I believe 4.
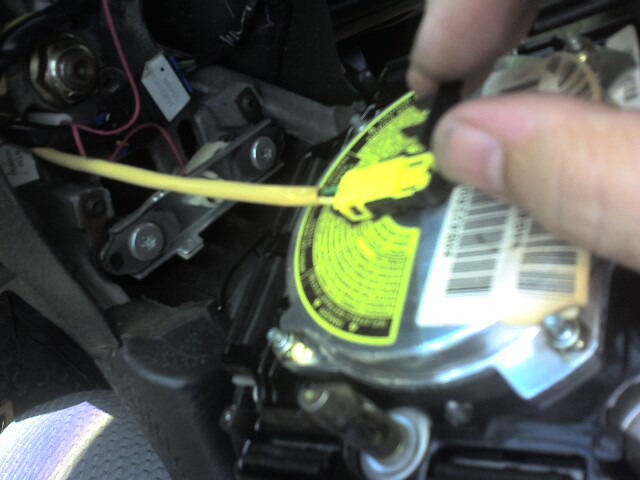
Carefully pull the retention clip and connector from the back of the air bag module.

Remove the steering wheel retention nut. Install the gear puller and pull the steering wheel. Be sure to release the horn connection. It is the white plastic piece with the two red wires.

Before we get to far, I need to mention this...You can see the two airbags for the trailblazer wheel. Only one will work with our truck. GM in there infinite wisdom, made a change to almost all newer vehicles by going to a 2 stage airbag. Our older truck and SUV's only have single stage. Trailblazers are 2 stage...So...

Chevy express vans of the year 2004 and up, had this airbag on the left. It is a single stage...However, the airbag plug is different, even though the wire colors are the same. The bag on the left is the trailblazer bag. It has 2 connections, both vastly different that what we need.

This is the other problem... the shaft on the column got smaller and the wheel will not just bolt on to the new shaft. I need to hone that hole out a bit, and also cut out a good portion of the area where the sticker that says 0475 is on the lower right.

Pulling of the old wheel. The reason I decided to undertake this little project is because the double din radio I installed for whatever reason didn't function right with the wheel controls, so I decided to remove them.

Got out the trusty dremel tool, and went to Lowes and bought this cutting tool for it. It was $11, but well worth every penny.

First I drilled and cut the opening I needed for the wires to come through for the airbag so they would not get crunched when the wheel went on.I wound up taking a little more out than in the picture, but i had no issues.

I also honed out the wheel and the old splines and made the hole bigger. Then I intalled the wheel back and forth severl time until I got it close, the used a lage socket and a small hammer to tap it on, then pull it off, and it slowly began making new splines.

To make it slide on a bit better, I used a little wheel bearing grease on it to make it a little easier.

You are going to have to splice your new airbag plug that you got off the express van to the wires on the old clockspring. Just simply match the colors...

Push the horn wire back in its spot and twist it to lock it in place, then plug in the airbag and pop it in place. Oh, did I mention to put the wheel nut back on? These aribags are a snap to remove too by the way, just stick a thin screwdriver in the holes on the side and push while you gently pull the bag. easy as anything...

All done and complete!

Key it up and watch the airbag light flash a few times then go out.

Sit the old wheel aside and figure out what to do with it...
In hindsight, If I was to do this again, I think I would hone the wheel out just a bit more. All in all, the whole project took less than 3 hours to accomplish. The hardest part is the honing, testing, and honing some more.
Have Fun!

.png)
.png)